Image Overlay for Elementor – Add Stunning Effects Easily
Elementor is a popular WordPress page builder, and Image Overlay is one of its exciting features. It helps you enhance the appearance of images on your website. By using image overlays, you can add unique effects, improve engagement, and make your site more attractive.
This article explains everything about Image Overlay for Elementor. Let’s dive into how it works, why it is useful, and how to use it effectively.
What is Image Overlay in Elementor?
An image overlay is a feature that allows you to place a semi-transparent layer or effect on top of an image. This feature can add text, buttons, or animations to images. It’s an excellent way to grab visitors’ attention and direct them to take action.
For example, you can use an overlay to highlight a sale, display a caption, or make your images look professional.

Benefits of Using Image Overlays
Image overlays offer multiple advantages for your website. Here are some key benefits:
1. Enhances Visual Appeal
Overlays make your images more stylish and attractive. They add depth and creativity, making your website stand out.
2. Improves User Experience
Visitors interact more with visuals that include overlays. A clear call-to-action (CTA) button or text can guide them effectively.
3. Supports Branding
Image_overlays let you add consistent colors, fonts, and logos. This strengthens your brand identity.
4. Highlights Key Information
You can showcase important details like product names, prices, or special offers on top of the images.
How to Add Image Overlays in Elementor?
Adding an image overlay in Elementor is easy. Follow these steps:
Step 1: Open Elementor Editor
Go to the WordPress dashboard. Select the page you want to edit with Elementor. Click Edit with Elementor.
Step 2: Add the Image Widget
Drag and drop the Image Widget onto your page.
Step 3: Configure the Overlay
Click on the image to open the settings. Go to the Style tab. Enable the overlay option. You can customize its color, opacity, and hover effects.
Step 4: Add Text or Buttons
Use the overlay feature to include text or buttons. This creates a dynamic image with actionable elements.
Step 5: Preview and Publish
Check how your image overlay looks in preview mode. If you are satisfied, click Publish to make it live.
Customization Options
Elementor offers many customization features for image overlays. Here’s what you can do:
1. Change Colors
Choose colors that match your website’s theme.
2. Adjust Opacity
Control the transparency of the overlay to suit your style.
3. Hover Effects
Add animations or effects when users hover over the image.
4. Typography
Customize fonts, sizes, and styles for text overlays.
5. Link Actions
Add clickable buttons or links to guide users to another page.
Best Practices for Using Image Overlays
To make the most out of image overlays, follow these tips:
1. Keep It Simple
Avoid cluttering the overlay with too much text or elements. Simple designs work best.
2. Use High-Quality Images
Always choose high-resolution images. Low-quality visuals can ruin the user experience.
3. Test Visibility
Ensure the text and buttons are readable. Adjust contrast and colors if needed.
4. Optimize for Mobile
Check how overlays appear on mobile devices. Responsive design is essential for user satisfaction.
5. Stay Consistent
Use similar overlay styles across your website to maintain a uniform look.
Why Choose GPL Dokan for Elementor Add-ons?
At GPL Dokan, you get access to premium Elementor add-ons, including tools for image_overlays. Here’s why you should choose GPL Dokan:
- Affordable and reliable.
- Regular updates.
- Simple installation process.
- Compatible with most themes and plugins.
- Lifetime support for premium tools.
Final Thoughts
Adding an Image Overlay for Elementor enhances your website’s visual appeal and functionality. It’s easy to use and highly effective in improving engagement. With tools from GPL Dokan, you can unlock premium features to take your website to the next level.
Once purchased, you can download the file from the “Downloads” tab that appears next to it, or at the Account -> Downloads page .
Before purchasing the product, please read the terms of use carefully at the page: Privacy Policy
If you have any questions, please read the FAQ section at the following link: FAQs
If you cannot find the answer to your question, please contact us via email [email protected] , or online support system.
Each product you can use for unlimited websites.
* Note: Do not use IDM to download products, because IDM will send a lot of requests to the server causing confusion, causing you to run out of downloads within a day with Membership
![[Lifetime Key] The Plus Addon For Elementor](https://gpldokan.com/wp-content/uploads/2022/09/The-Plus-Addon-for-Elementor-Page-Builder-WordPress-Plugin-247x247.jpg) [Lifetime Key] The Plus Addon For Elementor
1 × ৳499.00
[Lifetime Key] The Plus Addon For Elementor
1 × ৳499.00 Wordfence Security Premium
1 × ৳149.00
 Porto - Multipurpose & WooCommerce Theme
1 × ৳149.00
Porto - Multipurpose & WooCommerce Theme
1 × ৳149.00![[Lifetime Key] Ultimate Addons For Elementor](data:image/svg+xml,%3Csvg%20viewBox%3D%220%200%20247%20247%22%20xmlns%3D%22http%3A%2F%2Fwww.w3.org%2F2000%2Fsvg%22%3E%3C%2Fsvg%3E) [Lifetime Key] Ultimate Addons For Elementor
1 × ৳499.00
[Lifetime Key] Ultimate Addons For Elementor
1 × ৳499.00
 Wordfence Security Premium
  Porto - Multipurpose & WooCommerce Theme
 ![[Lifetime Key] Ultimate Addons For Elementor](https://gpldokan.com/wp-content/uploads/2023/04/ultimate-addons-for-elementor.png) [Lifetime Key] Ultimate Addons For Elementor
[Lifetime Key] Ultimate Addons For Elementor 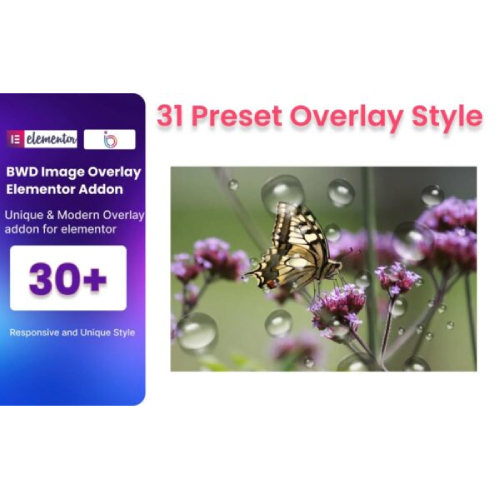





![[CrocoBlock] JetWooBuilder For Elementor](https://gpldokan.com/wp-content/uploads/2022/05/Jetwoobuilder-247x247.png)

![[Lifetime Key] Solid Affiliate](https://gpldokan.com/wp-content/uploads/2023/06/solid-affiliate.jpg)
![[Lifetime Key] Schema Pro](https://gpldokan.com/wp-content/uploads/2023/04/schema-pro.jpg)
![[Lifetime Key] Convert Pro](https://gpldokan.com/wp-content/uploads/2023/04/Convert-Pro.jpg)
![[Lifetime Key] Astra Pro](https://gpldokan.com/wp-content/uploads/2022/08/Astra-–-Fast-Lightweight-Customizable-Free-WordPress-Theme-Download-Now--247x247.jpg)
![[Lifetime Key] Imagify](https://gpldokan.com/wp-content/uploads/2023/04/imagify-image-optimization-plugin.jpg)






![[Lifetime Key] EmbedPress Pro](https://gpldokan.com/wp-content/uploads/2023/07/embedpress-pro.jpg)
![[One Year Key] WP Ultimo](https://gpldokan.com/wp-content/uploads/2023/11/wp-ultimo.jpg)
![[Lifetime Key] All-in-One WP Migration – URL Extension](https://gpldokan.com/wp-content/uploads/2023/05/all-in-one-wp-migration-url-extension.jpg)
![[Lifetime Key] All-in-One WP Migration – FTP Extension](https://gpldokan.com/wp-content/uploads/2023/05/all-in-one-wp-migration-ftp-extension.jpg)
![[Lifetime Key] All-in-One WP Migration – OneDrive Extension](https://gpldokan.com/wp-content/uploads/2023/05/all-in-one-wp-migration-onedrive-extension.jpg)